Pick a shoe style on Shoe Zero, open the 3D Customizer, and build your design from scratch or let AI Assist feature help you. You can go from a blank shoe to a finished, ordered pair in about ten minutes. The whole process happens in your browser with no software to install.
Shoe Zero has delivered over 120,000 custom pairs since 2021, and the most common question new customers ask is how to design shoes that actually match what they pictured. This guide walks through every tool in the customizer so you know exactly what to expect. You'll learn how to create your own shoes for your personal use, gifts, or business branded shoes for your company.
Key Takeaways
- Browse Shoe Zero's collection, pick a shoe style, and click the customize button to open the 3D editor.
- Upload any image to AI Design Assist and let it generate complete design concepts in seconds.
- Fine-tune colors, text, logos, and graphics using the manual tools below the 3D preview.
- Save your design as a shareable link or go straight to checkout with your size and order quantity.
What You Can Design with Shoe Zero
Shoe Zero offers fully customizable shoes across dozens of styles, from low-top sneakers and high-tops to boots, sandals, and kids' shoes. Each one starts as a blank canvas you control completely. The customizer lets you change the color of every visible section, including the tongue, toe box, heel, and side panels.
You can upload any image to the shoe surface. Company logos, personal artwork, full-surface patterns, and photographs all work. Text is supported too, so names, slogans, dates, and jersey numbers can go anywhere you place them. The customizer handles both simple one-logo designs and full-wrap graphics that cover the entire shoe.
Step 1: Choose Your Shoe Style
Start by browsing the product catalog. Each style is organized by category, so filter by the type that fits your purpose. The product photos show each style from multiple angles so you can check the shape and surface area before opening the customizer.
Once you find a style, click the customize button on the product page. This opens the 3D Customizer where all the design work happens. The shoe loads as a blank white model in the center of your screen.
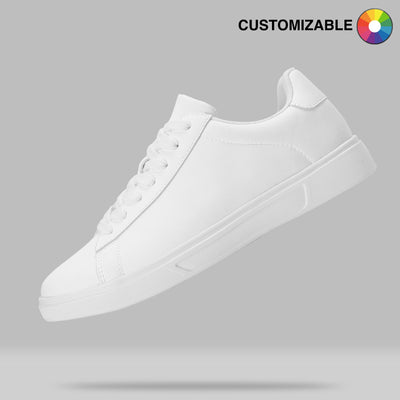
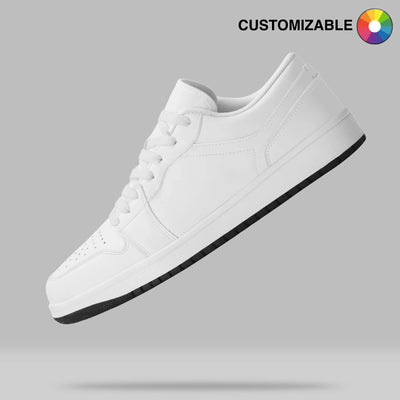
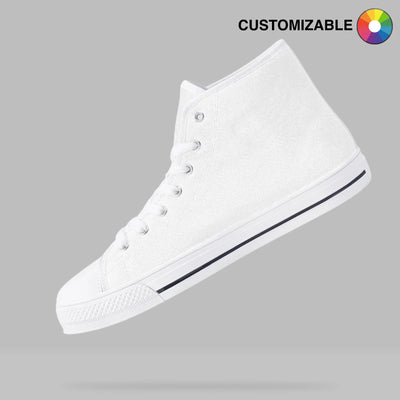
The most popular starting point we see across orders is the low-top sneaker. It gives the largest flat print area, which works well for bold, graphic-heavy designs. High-tops attract customers who want maximum surface coverage, while classic styles tend to photograph well at events. If you want to make your own shoes but aren't sure which style fits your vision, the low-top is a safe first choice.

Step 2: Design Your Shoes in the 3D Customizer
The customizer opens with your shoe as a 3D model you can rotate by clicking and dragging. We recommend starting with AI Design Assist because it handles the heavy lifting, but if you already have a clear vision, skip ahead to the manual tool sections below. Learning how to customize shoes in this editor takes just a few minutes either way.

Start with AI Design Assist
AI Design Assist is the fastest way to go from a blank shoe to a complete design. Click the button on the left side of the screen and upload your photos. This can be a company logo, a piece of artwork, or any image you want on the shoe.
The feature reads the colors in your uploaded image and suggests a palette that works well together. You can modify these suggestions or pick entirely different colors if the choices don't match your vision. It then generates four design concepts, each placing your images and colors differently across the shoe so you can compare options side by side.
Pick the concept closest to what you want and it loads into the full customizer for fine-tuning. The AI Design Assist feature works best as a starting point that sparks concepts, while the human eye finalizes the details.
How to Change Shoe Colors

Click any section of the shoe to select it. The tongue, toe box, heel panel, side panels, and other areas are all individually selectable. Once a section is highlighted, click a color from the preset bar at the bottom of the screen to apply it instantly.
For exact color matching, click the color wheel icon on the far left of the color bar. This opens a color picker where you can enter the hex code instead. This feature work best for businesses that uses a particular shade for branding.
Each section accepts one solid color. If you want a gradient, a texture, or a pattern like camouflage on a specific part of the shoe, upload it as an image instead. The next section covers how uploading works.
Uploading Images and Logos
Click the section of the shoe where you want the image placed, then click the "Upload Photo" button in the bottom toolbar. Select your file and it appears on the shoe immediately. Once the image is on the shoe, drag it to reposition and use the handles to resize.
The image stays on the section you selected, so if you placed it on the side panel it only appears there. To add the same image to a different section, select that section and upload again. This feature works for everything from high-resolution company logos to personal photos to full-surface patterns like camouflage.
For the cleanest results with logos, use a PNG file with a transparent background. That way the shoe color shows through around the logo instead of a white or colored box. Anything under 300 DPI tends to look slightly soft on the final print, especially across large areas, so start with the highest resolution file you have.
Adding Text to Your Shoes
Select the shoe section where you want text, then click "Add Text" in the bottom toolbar. A text box appears on the shoe where you can type your message. Names, dates, jersey numbers, short slogans, and initials all work well.
After typing, drag the text to position it and resize as needed. Some customers put their name on the heel, a date on the tongue, or a motivational phrase along the side. Keep text short, because long sentences shrink to fit a curved surface and become hard to read. One to three words per placement tends to look best on the finished shoe.
Pre-Made Design Elements
The "Add Element" button in the toolbar opens a library of pre-made graphics. These include shapes, icons, and decorative pieces you can place on any section of the shoe. The selection is smaller compared to uploading your own artwork, but it works well for quick accents or decorative touches when you don't have custom files ready.
Preview Your Design in 3D
Before clicking Done, rotate the shoe to inspect every angle. Click and drag the 3D model to spin it around and check the top view, both sides, the back heel, and the toe. The back heel area is easy to forget, and it's one of the first things people notice when you walk away from them.
Your design applies to the right shoe and is automatically mirrored to the left. You cannot design the left and right shoes differently. This keeps the process simple and ensures a matching pair every time.

Step 3: Save or Order Your Custom Shoes
When your design is ready, you have two options. Click the share icon in the top right to generate a unique URL for your design. Bookmark it or send it to someone for feedback, and you can return later to pick up where you left off.
We regularly see customers send these links to friends, business partners, or team members before committing to an order. You can design your own shoes online at your own pace and come back whenever you're ready. Click the green "Done" button in the top right when you're satisfied, and the customizer moves you to checkout.
Select Your Size and Quantity
In the cart, each shoe shows a size dropdown and a quantity field. Select the size for each pair you're ordering, and if you're not sure about sizing, Shoe Zero's sizing guide can help you get it right the first time. You can also add multiple sizes of the same design in one order by clicking "+ Add Size," which is useful for team orders or gifts where you need the same look in different sizes.
Complete Your Order
Click "Checkout" and you'll land on the payment page. Enter your delivery address and pick a shipping method. Payment options include:
- Credit card
- PayPal
- Shop Pay
- Google Pay
- Apple Pay
- Amazon Pay
After payment, your order enters production. Shoe Zero uses a sublimation printing process where each pair is printed, dried, sealed, heat-treated, and quality-checked before shipping. Production takes 2-3 weeks, then shipping takes 3-4 weeks. We ship worldwide to 190+ countries with tracking on every order.
Ordering Custom Shoes for Your Business
Everything in this guide applies to bulk orders too. If your company needs branded shoes for a trade show, employee gifts, or a product launch, the process starts with the same customizer. Design one pair, approve the look, and scale the quantity at checkout.
Many of our clients order anywhere from 50 to 500 pairs for a single event. If you have a large order or custom requirements, reach out through our business inquiry page. Every business client gets a dedicated team member who works directly with them on the design, from initial concept through final approval. We handle layout adjustments for bulk production, advise on what prints best at scale, and manage timeline expectations so nothing surprises you. Most business orders start with a single sample pair before scaling to the full run.
Frequently Asked Questions
Do I need design experience to use the customizer?
No. The 3D Customizer is built for beginners, and AI Design Assist can generate a complete design from your photos in under two minutes.
Can I design shoes on my phone?
The customizer works in mobile browsers. A larger screen gives you more room for detailed placement, so a laptop or desktop is better for first-time designs.
How long does production take after I order?
Production takes 2-3 weeks, then shipping takes 3-4 weeks. We ship worldwide to 190+ countries with tracking on every order.
Can I order just one pair?
Yes, there is no minimum order at Shoe Zero. Single pairs and bulk orders of hundreds both go through the same production process.
What image file types work in the customizer?
PNG and JPEG files both work. Having a transparent background gives the cleanest result for logos.
Can I save my design and come back later?
Yes. Click the save icon to generate a unique URL that loads your exact design when you return.